Pi RuView is not a separate product name; it is a search pattern from users who want to know how the RuView WiFi sensing project fits a Raspberry Pi or other small edge computer. The safest answer is staged. Use ruview.blog or the hosted GitHub Pages demo for orientation, use github.com/ruvnet/RuView as the source of truth, then treat the Pi as an edge host only after you understand which parts of the stack are software, model, firmware, or real CSI capture.
This guide is intentionally different from the RuView GitHub guide and the ESP32 CSI guide. The GitHub page explains how to inspect the repository. The ESP32 page explains low-cost CSI acquisition. This page connects the middle: what to do on a Raspberry Pi, what to leave on ESP32 sensor nodes, what Docker or model files imply, and how to avoid mistaking a working demo for a validated sensing deployment.
What “Pi RuView” usually means
Most people searching pi ruview are trying to answer one of three questions. Can I open the RuView demo on a Pi browser? Can I run the RuView software or Docker path on Raspberry Pi hardware? Can a Pi replace the ESP32 CSI sensing node? Those are separate questions, and mixing them leads to bad debugging.
A Raspberry Pi can be useful as a local host, bridge, dashboard, MQTT/Home Assistant companion, or model-running edge computer when the current repository path supports the architecture. It is not automatically a CSI sensor. For CSI capture, check the repository and ESP32-specific documentation before assuming the Pi WiFi chip exposes the signal detail that RuView-style sensing needs.
- Use the hosted demo for interface orientation and sharing.
- Use GitHub for exact setup commands, current architecture support, issues, and Docker notes.
- Use ESP32 or another compatible CSI device when the task is real WiFi channel capture.
- Use Raspberry Pi as an edge host only after runtime and model assumptions are confirmed.
Step 1: open the hosted demo first
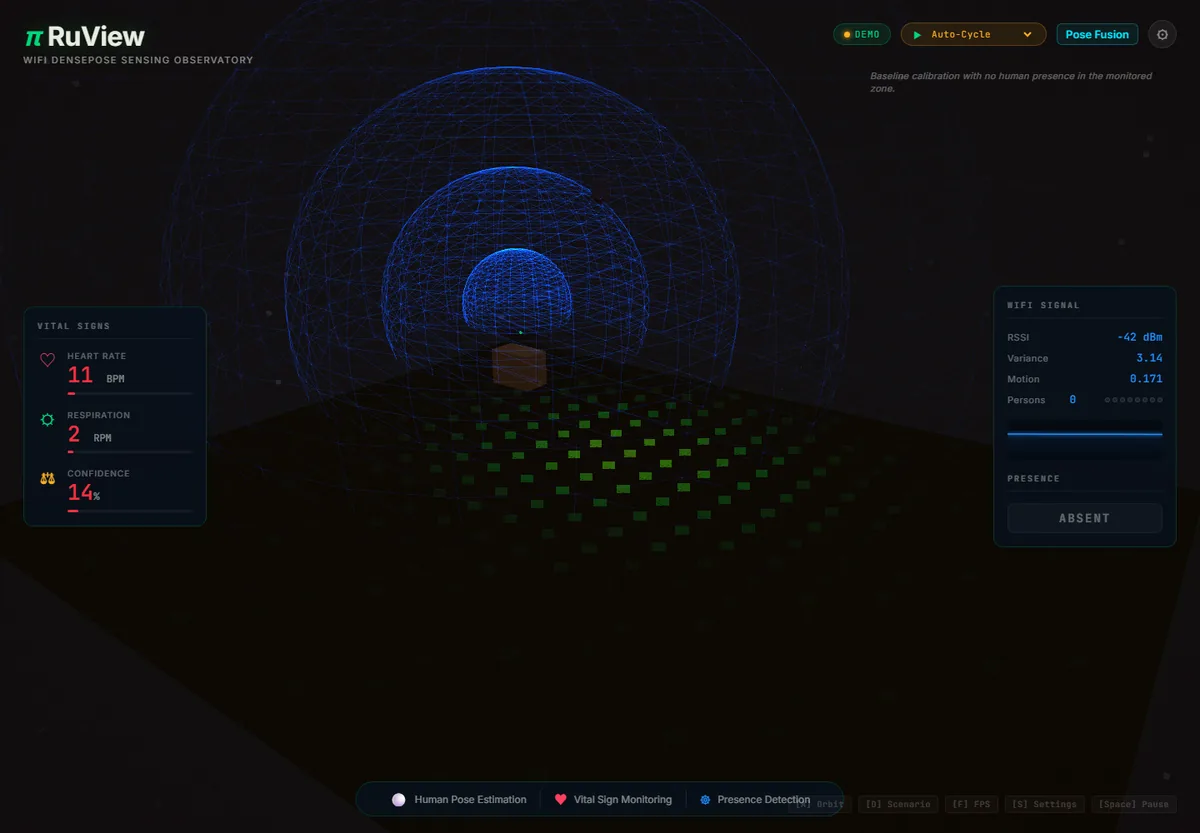
The fastest first test is the hosted RuView demo. It confirms what the interface looks like, whether your browser can load the page, and how the project describes presence, movement, breathing, heart-rate trends, and room intelligence. This step does not prove that your local hardware can sense a room. It only removes the browser and UI from the list of unknowns.
On a Raspberry Pi desktop, a modern Chromium-based browser is usually the most practical way to inspect the demo. If the page is slow, test from another machine before changing sensor code. A weak browser session should not be confused with a CSI, model, or Docker failure.
| Question | Best first action | What it proves |
|---|---|---|
| Can I see RuView quickly? | Open the hosted demo or ruview.blog homepage | The browser interface loads |
| Can I debug the software? | Open the GitHub repository and README | The current setup path is known |
| Can I sense a room? | Validate CSI capture with compatible hardware | The signal pipeline has real data |
Step 2: verify GitHub before copying commands
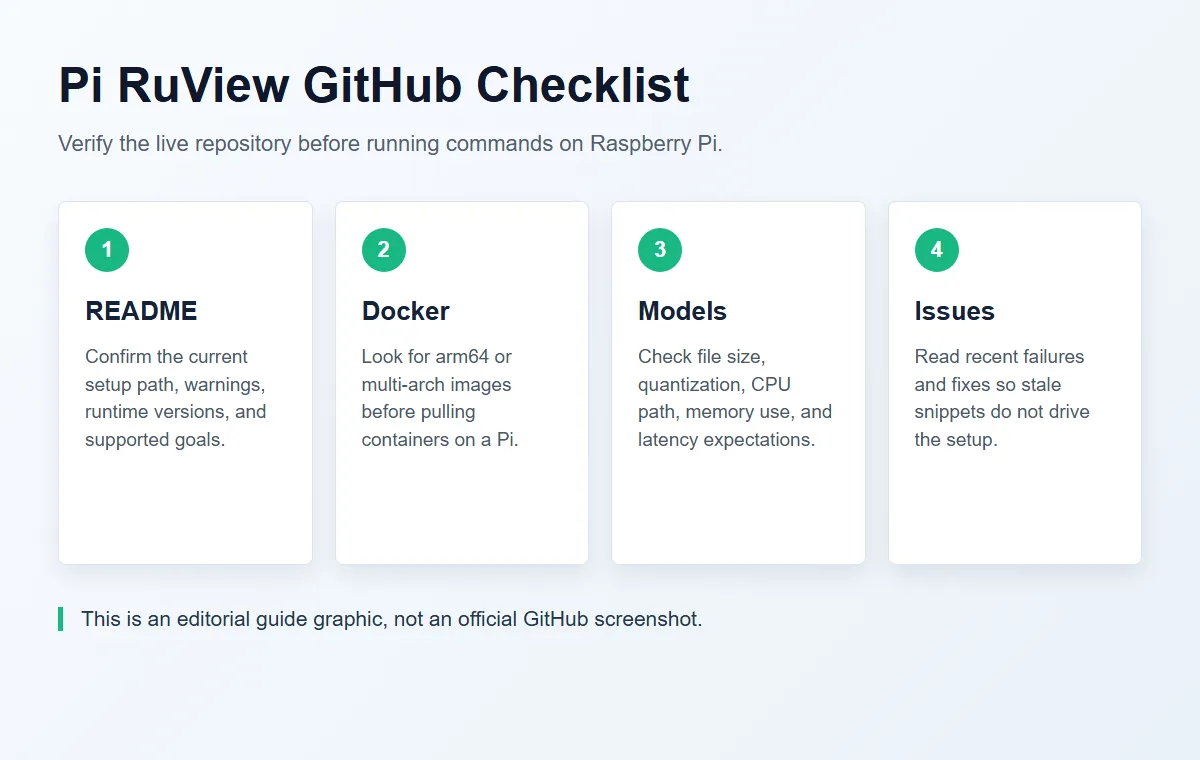
The official source is github.com/ruvnet/RuView. Check the README, recent commits, issues, Docker notes, model links, and architecture labels before you run a command on a Pi. A blog snippet or cached README can be stale within days on an active open-source project.
For Pi work, architecture matters. Look for linux/arm64 support, container images that mention arm64, Python or Node versions, Rust toolchain notes, and model files that can run within your memory budget. If a command was written for a desktop GPU or x86 server, do not assume it will behave the same on a Raspberry Pi.
| Repository area | Pi-specific check | Why it matters |
|---|---|---|
| README | Current install path and warnings | Avoids stale setup instructions |
| Docker notes | arm64 or multi-arch image support | Prevents pulling an incompatible image |
| Model links | File size, quantization, CPU path | Keeps edge inference realistic |
| Issues/releases | Recent setup failures or fixes | Shows whether a problem is known |
Step 3: decide what the Raspberry Pi should do
A good Pi RuView setup starts with a narrow role. For many users, the Pi is best as a local always-on host: it can run a dashboard, bridge data to Home Assistant, receive sensor streams, store notes, or serve a small local UI. For model experiments, a Pi 5 is more plausible than older boards, but memory, cooling, and CPU load still matter.
Do not assign every role to the Pi at once. If you are testing the browser UI, keep hardware disconnected. If you are testing Docker, use simulated or recorded data first. If you are testing sensing, capture raw CSI separately and only then connect it to a RuView-style interpretation layer.
- Browser review: Pi opens the demo and documentation.
- Local host: Pi runs the documented service path when architecture support is present.
- Bridge node: Pi receives ESP32 or MQTT data and forwards it to a dashboard.
- Edge inference: Pi runs small models only after model size, CPU load, and latency are measured.
Step 4: keep ESP32 CSI capture separate from Pi hosting
RuView-style sensing depends on Channel State Information, not just a normal WiFi connection. ESP32 boards are a common low-cost capture path because projects such as ESP-CSI and ESP32 CSI Tool expose packet-level channel data. A Raspberry Pi may still be useful nearby, but it should not be treated as a replacement sensor unless the exact WiFi hardware and driver path can export the needed CSI data.
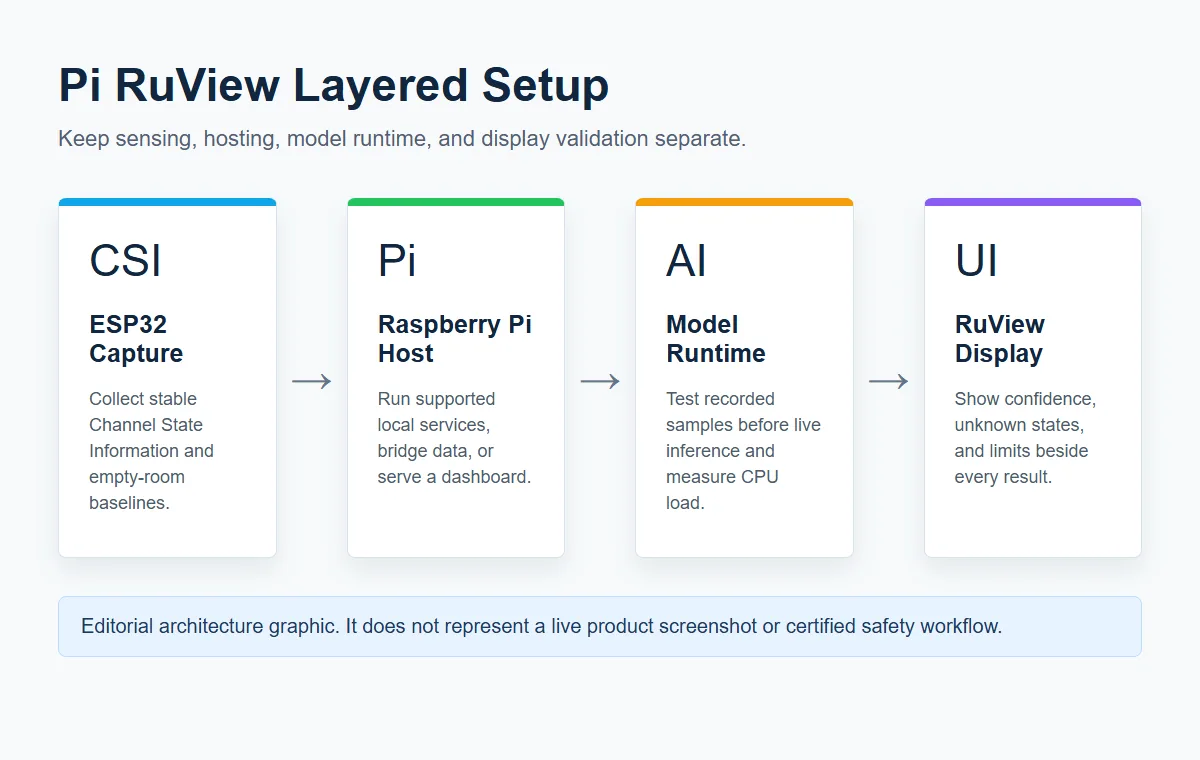
The clean architecture is simple: ESP32 or compatible hardware captures CSI, the Pi hosts or forwards the processing layer, and RuView displays confidence, trends, and limitations. That separation makes debugging possible. If the CSI log is empty, fix the sensor path. If Docker fails, fix the Pi runtime. If the output overclaims, fix validation and copy before deployment.
| Layer | Typical device | Validation question |
|---|---|---|
| CSI capture | ESP32-S3/C3/C5/C6 or research WiFi hardware | Can it export stable CSI packets? |
| Local hosting | Raspberry Pi or small Linux box | Can it run the documented software path? |
| Model or feature pipeline | Pi, desktop, or edge module | Can it process recorded data repeatably? |
| RuView display | Browser or dashboard | Does it show uncertainty and limits clearly? |
Step 5: use pretrained model links cautiously
The RuView README points users toward pretrained WiFi DensePose resources on Hugging Face. Treat those files as model artifacts, not universal proof that your room, board, or Pi will produce the same result. Before using a model on live data, test a small recorded sample, note the model version, and compare output against labels collected in your room.
For Raspberry Pi use, the important questions are model size, CPU support, quantization, memory pressure, warm-up time, and how missing or noisy CSI is handled. A model card or README screenshot is useful for orientation, but the real acceptance test is whether your own capture produces stable, interpretable outputs.
A safe Pi RuView setup checklist
Use this checklist when you want a repeatable path instead of a one-off demo. Write down the repository commit, Raspberry Pi model, OS image, browser version, container tag, model file, sensor board, firmware version, WiFi channel, room layout, and test labels. These notes let you tell whether a later result changed because of code, hardware, room geometry, or model behavior.
The first live sensing session should be boring on purpose: empty room, one person enters, one person sits still, walking across the link, door movement without a person, and a changed device placement. If the pipeline cannot reject false positives in these simple cases, it is not ready for health, safety, security, or automation decisions.
- Record software versions before connecting hardware.
- Test simulated or recorded data before live sensing.
- Keep empty-room and false-positive scenarios in every validation pass.
- Use cautious copy for breathing, heart-rate, fall, or security claims.
How this page avoids keyword cannibalization
This page owns the Pi and Raspberry Pi setup intent. The RuView GitHub guide remains the target for ruview github, github ruvnet ruview, and repository navigation. The ESP32 CSI guide remains the target for hardware capture and firmware questions. The WiFi human detection page remains the target for presence-detection reliability and false positives.
Keeping these boundaries clear helps users and search engines. A Pi user gets a practical staged workflow, while users searching for GitHub, ESP32, dataset, or human-detection details still land on the page that best matches their problem.
Official sources and technical references
Pi RuView Setup FAQ
Is Pi RuView a separate official project?
No. Pi RuView is a search phrase for using RuView with a Raspberry Pi or similar edge computer. The official project source remains github.com/ruvnet/RuView.
Can Raspberry Pi capture WiFi CSI for RuView?
Do not assume that. A Pi can host software or dashboards, but CSI capture depends on compatible WiFi hardware and drivers. ESP32 CSI devices are the safer low-cost starting point.
Can I run RuView on a Raspberry Pi without hardware?
You can inspect the demo and may be able to run software or Docker paths when the current repository supports your architecture. Real sensing still needs validated CSI input or recorded sample data.
What should I test first?
Open the hosted demo, verify the official GitHub README, run the simplest software path with simulated or recorded data, then connect ESP32 CSI hardware only after the runtime is understood.
Is Pi RuView safe for health or security decisions?
No. Treat it as research and prototyping. Breathing, heart-rate, fall, security, or occupancy claims need independent validation and conservative limits.